
By default WordPress allows readers to write comments under the posts. Comments are a great way to create an interaction with your readers and get feedback from them. But unfortunately, WordPress comments are constantly subject to spam messages.
Spam comments are mostly sent by automatic software and contains links that lead to the attackers own pages. Even non-popular WordPress blogs can get thousands of spam comments every day. As it increases traffic and resource usage, these comments can damage your reputation of your WordPress blog. Also, it has a negative impact on your search engine rankings. In this guide we will talk about what you can do to block WordPress spam comments.
WordPress can easily be installed and managed with any one of our cPanel VPS packages. Optionally, an automated script installer called Softaculous can be configured to handle automated installation of a few hundred popular CMS systems. It’s totally worth it!
What you will need ?
Before you begin, you should have the following:
- Access to the WordPress Admin Panel
Step 1 – Installation of Akismet Anti-Spam
What is Akismet? The most popular method for blocking WordPress spam comments is the Akismet plugin. This plugin allows all comments to be sent to Akismet servers and controlled by complex algorithms. If comments are marked as spam, Akismet blocks them.
Akismet is so effective that it is comes default with your WordPress installation, it just needs to configured. To configure the Akismet plugin follow the steps below :
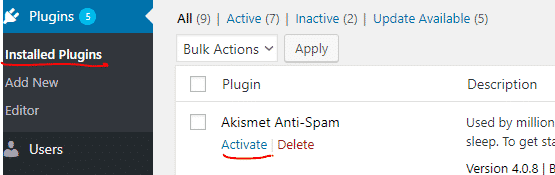
1 . Log in to the WordPress admin panel.
2. Open the Installed Plugins section and click on the Activate button under the Akismet plugin.
3. On next page you will see a big green success message. Press Setup your Akismet account button.

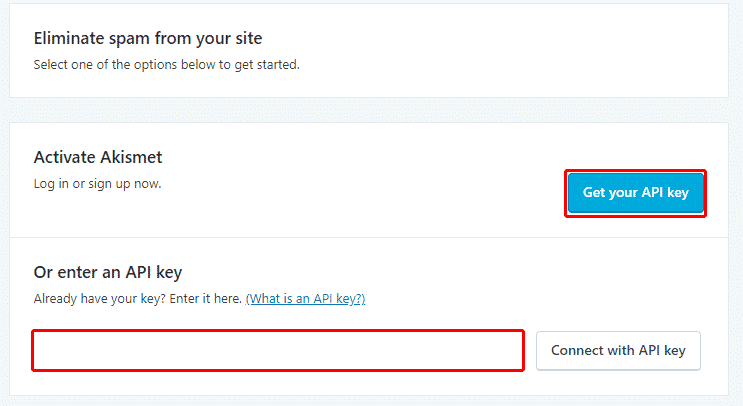
4. API key is required for Akismet to work. Click the Get API key button to proceed. Alternatively, if you already have an API key, enter it in the field below and press the Connect with API key button.
5. You will be directed to official Akismet page. Click Activate Akismet button.

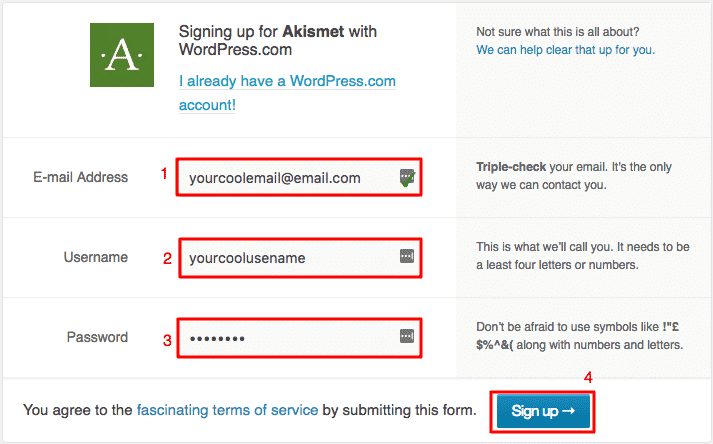
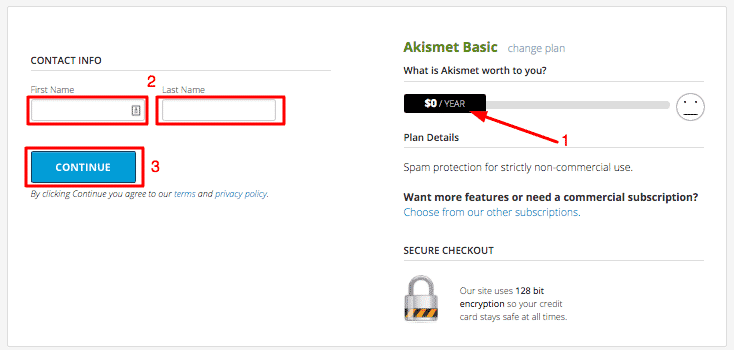
6. To proceed, you must create an Akismet account. Enter your details and click the Continue button.
7. If you do not need advanced spam protection, you can select Get A Personal Plan which is completely free and move on.
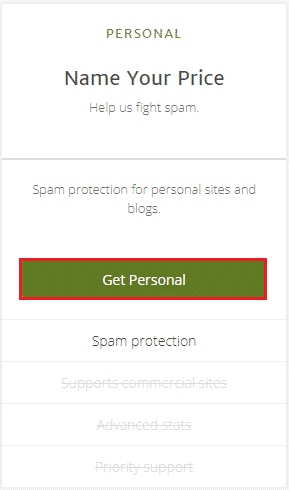
8. Use the slider on the screen and set the price to $0/year. After entering your contact information, press Continue.
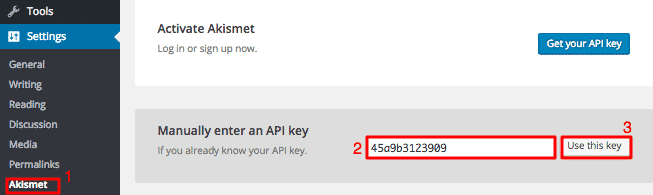
9. You will be directed to the Akismet Account page. The API key can be seen at the top of the page. Press the eye icon and copy the API key.

10. Go back to the WordPress admin panel, open the Akismet settings page, and enter your API key.
11. At the top of the page you will see a green message.
![]()
Congratulations, you have successfully setup the Akismet plugin. All spam comments will now be automatically collected in the Spam Folder and will be deleted after 15 days.
Step 2 – Using Google ReCaptcha for WordPress Spam Comment Blocking
To prevent the spam commenting on our block the second method is ReCaptcha. This system automatically creates a visually composed image of characters and demands the user to enter the characters in the corresponding field to prove that they are human or not. ReCaptcha is a great way to block the commands which are created by a software. Unfortunately, it is not effective to stop the manual spam; so for that we first set up the Akismet plugin.
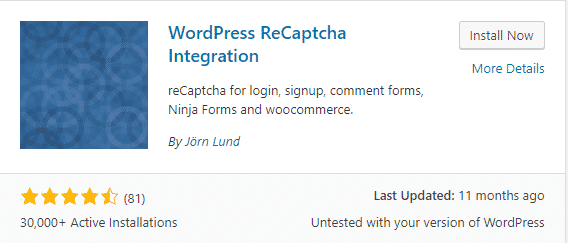
Although there are quite a few add-ons to use ReCaptcha with WordPress, we recommend using WordPress ReCaptcha Integration by Jörn Lund because it’s easy to use and user friendly. Follow the steps below to install and configure the respective plug-in.
1. Open the WordPress admin panel and access to the Add New Plugin section.
2. Install the WordPress ReCaptcha Integration plugin and Activate it.
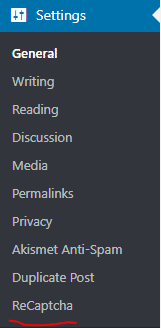
3. When the installation is complete, open the settings page for the plug-in on the left sidebar.
4. In order to setup ReCaptcha, please provide a redirect to the Google ReCaptcha admin page by clicking the Site key and Secret key from Google google reCAPTCHA admin page page. Remember, you need a Google Account to access this page.
![]()
5. On target screen first of all you should save your blog address. Enter your domain name in the Label and Domains fields, and then click the Register button.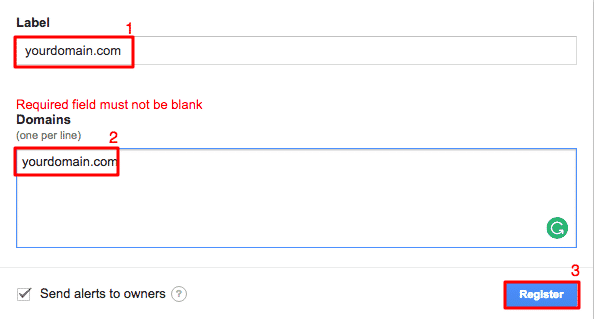
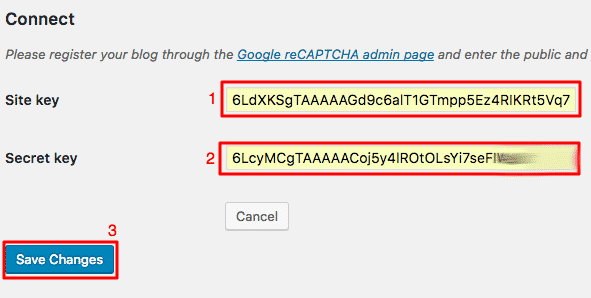
6. New Site and Secret keys will be created for your blog.

7. Copy the two keys and go back to the settings section of the ReCaptcha plugin.
8. Paste the keys into the relevant fields and click the Save Changes button.
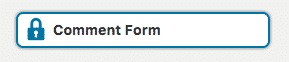
9. You should now be able to see more settings. Click the Comment Form button to enable ReCaptcha for comments.
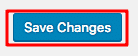
10. At the bottom of the page you will see the Save Settings button. To finish the setup click to it.
That is all! You have successfully activated Google ReCaptcha. Your users are now required to complete the ReCaptcha application before submitting their comments.
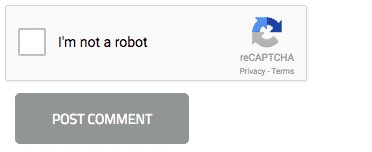
Result
Spam comments can hurt your account on the WordPress blog site and even your hosting account. It increases the use of other resources by raising traffic, and the search engine affects your rank in the wrong direction. By completing this guide, you have learned how you can protect your WordPress blog site from spam comments.
Leave A Comment?