When purchasing a new VPS, one wonders how you will manage it for your needs.
Especially if you are planning to use it for website hosting; managing it can be more tricky. The best option is to use some hosting panels on your VPS. There are numerous paid-for ones like cPanel, Plesk, DirectAdmin or free ones like CentOS Web Panel, CyberPanel. Virtualmin is an open source Webmin based robust web server application which is widely used for web hosting purposes. It has a website control panel for domain hosting purposes and has the ability to create and manage web sites. With Virtualmin, you can configure your server easily via the web panel with the settings you need, add or remove server-side plugins etc. For example, you can easily install WHMCS, phpMyAdmin, Django or RoundCube.
Easily install Virtualmin; which is described in this article on one of our Linux VPS packages:
Now, Lets’s see how you can install it to your VPS
Installation
First, we need to update server-side packages and install nano;
If you are using RHEL / CentOS operating systems use the code below;
yum -y update
 yum -y install nano
If you are using Ubuntu / Debian operating systems use the code below;
apt-get update && apt-get upgrade
 apt-get install nano
We should verify the hostname;
hostname -f
![]()
if you get the following error you should edit the hosts;
nano /etc/hosts
After editing and saving it, you should recheck and see the hostname prefix at the output of hostname -f command again.
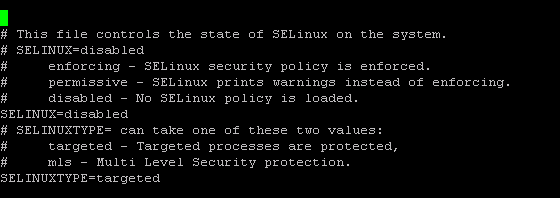
Now we need to be sure that we disabled SELinux ( except for CentOS, SELinux may not exist, you can pass this section );
nano /etc/sysconfig/selinux
The setting should be SELINUX = disabled ;
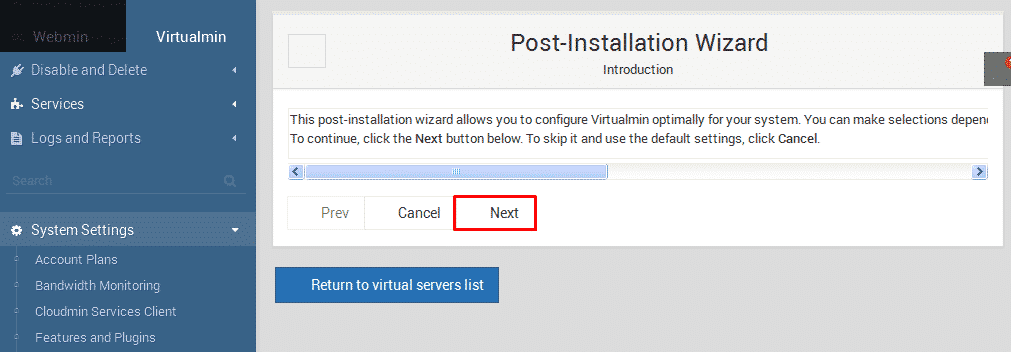
Now we can move on installation Virtualmin;
wget http://software.virtualmin.com/gpl/scripts/install.sh
 sudo /bin/sh install.shnano /etc/sysconfig/selinux
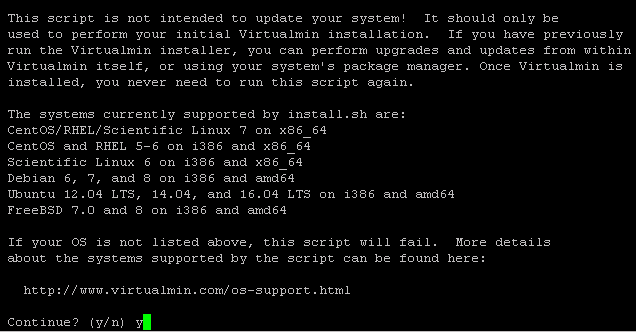
Proceed by selecting ‘y’.
Then we will enter the hostname, just write your hostname and press enter. For example, server.virtualservers.co.za
The setup process will continue with the installation of the required plugins. As soon as it is finished, you should restart your server:
reboot
service iptables stop
 iptables -F
 iptables -X
 iptables -A INPUT -p tcp --dport 10000 -j ACCEPT
 service iptables save
 service iptables start
How to Use
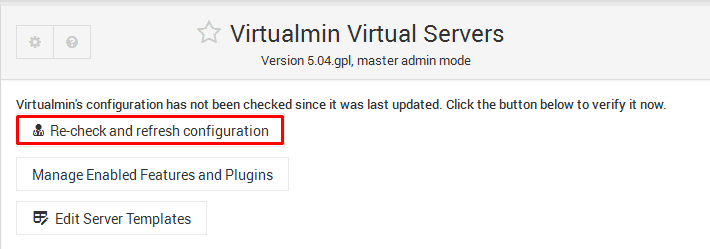
Accessing the Virtualmin panel:
https://ipadress:10000
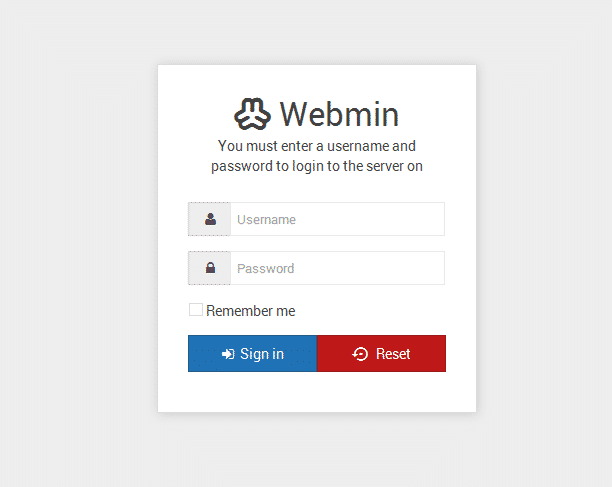
The login user is root, and the password is the root password you specified during your order.
If you want to change the virtualmin root password;
Now let’s add a virtual server (it is a virtual vhost). This host will be defined with a domain name. Indeed, we are just opening a hosting account. Now we click Create Virtual Server;
![]()
Now we will fill the red areas according your domainname and password.
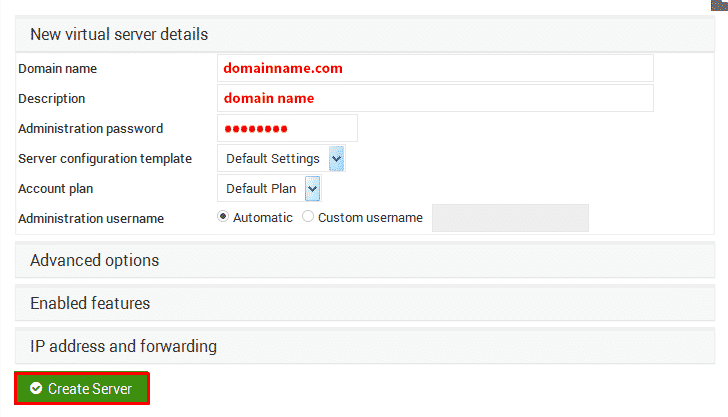
We create a hosting account now. If you missed something during hosting creation step, like virtual server details, assigning wrong a quota, forgot to allow MySQL or something similar you can return to the configuration by clicking Return the virtual servers details.
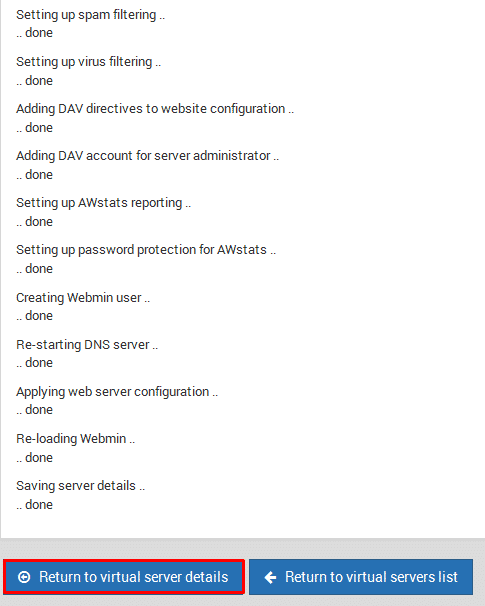
You can start to upload files under your account put your domain live by just forwarding your nameserver.
Leave A Comment?